


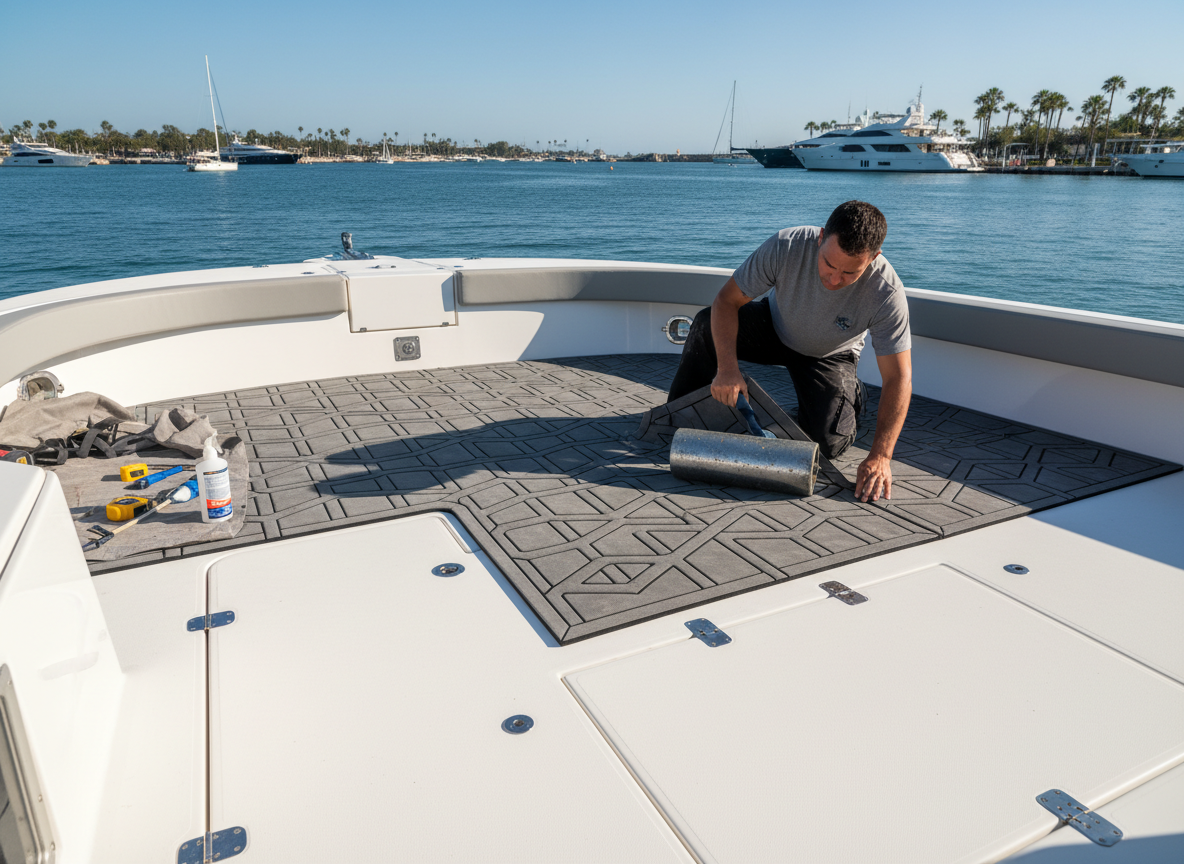
How to Install EVA Foam Boat Flooring
There are two main ways to install EVA foam boat flooring: (A) a full DIY approach starting from raw EVA foam material sheets, and (B) installing a custom pre-cut EVA foam kit that has been designed to fit your boat. Choose the path that matches your project and follow the step-by-step guide below.
Installation Guide: DIY EVA Foam Boat Flooring from Material Sheets
Modern EVA foam marine flooring offers a combination of comfort, performance, and aesthetics that is hard to beat. Made from closed-cell ethylene-vinyl acetate (EVA) foam, it resists water absorption, provides excellent traction, and helps reduce fatigue during long days on the water.
Key advantages of EVA foam boat flooring include:
- Comfort: Cushioned surface that is easier on feet, knees, and backs than gelcoat or fiberglass.
- Traction: Textured patterns and non-slip surfaces help reduce the risk of slips and falls, even when wet.
- Noise reduction: EVA foam helps dampen vibrations and deck noise—great for anglers and families alike.
- Low maintenance: Easy to clean with mild soap and water; no need for harsh chemicals or deep carpet cleaning.
- Custom look: Available in many colors, faux teak styles, and patterns to complement your boat’s design.
- DIY-friendly: Peel-and-stick backing and template-based installation make it realistic for many boat owners to install it themselves.
Use this guide if you purchased raw EVA foam sheets and need to create your own custom layout. You will be measuring, templating, and cutting every piece to fit your specific boat before bonding it to the deck.
EVA Foam Flooring and Materials
- Pre-cut EVA foam boat flooring kit or sheets from your marine flooring manufacturer
- Manufacturer-approved marine adhesive (if your product is not self-adhesive)
- Masking paper, kraft paper, or plastic foil for templates
- Painter’s tape or masking tape
- Permanent marker or fine-tip felt pen
- Cardboard for small, detailed templates (optional)
Tools
- Sharp utility knife or hobby knife with plenty of fresh blades
- Straightedge or metal ruler
- Scissors (for template material)
- Measuring tape
- Pencil or grease pencil
- Hard rubber roller, laminate roller, or J-roller
- Plastic squeegee or wallpaper smoothing tool
- Clean rags and microfiber cloths
- Kneepads (highly recommended for comfort)
Cleaning and Prep Supplies
- Mild boat soap and fresh water
- Non-residue surface cleaner or isopropyl alcohol
- Plastic scraper or putty knife
- Medium-grit sandpaper or sanding pads (if needed)
- Vacuum or shop vac
- Acetone or xylene (only if recommended by the manufacturer and used with proper ventilation and PPE)
Step 1: Prepare the Boat Deck Surface
Use this guide if you ordered a custom pre-cut EVA foam boat flooring kit that is already designed for your specific boat model or templated layout. Your main tasks are surface prep, dry fitting the labeled pieces, careful alignment, and adhering them in the recommended order.
- Remove old flooring and hardware: Take out snap-in carpet, mats, and any existing non-skid pads. Remove hardware and accessories that interfere with the flooring, such as seat bases (if possible), cooler tie-downs, and deck plates.
- Scrape away residue: Use a plastic scraper or putty knife to remove old adhesive, silicone, or caulking. Be careful not to gouge the gelcoat or fiberglass.
- Wash thoroughly: Clean the deck with mild boat soap and water to remove dirt, oils, and loose debris. Rinse well and allow it to dry completely.
- Degrease the surface: Wipe all areas where EVA foam will be applied with a non-residue cleaner or isopropyl alcohol to remove any remaining contaminants.
- Lightly sand if needed: If the surface is very glossy or has stubborn residue, lightly scuff with medium-grit sandpaper, then vacuum and wipe clean again.
- Dry time: Make sure the deck is fully dry before moving on. Moisture trapped under the flooring can cause adhesion failure.
Step 2: Create Accurate Deck Templates (DIY Only)
Accurate templates are the key to clean lines and a custom-fit look. Even if you are using a pre-cut EVA foam boat flooring kit, templating can help you confirm fit and placement before you peel the backing.
- Lay down template material: Cover each deck section with masking paper, plastic sheeting, or kraft paper. Overlap seams and tape them securely so the template does not move.
- Trace the outlines: Carefully trace along hatches, consoles, gunwales, and other edges with a permanent marker. Mark any cutouts for hinges, deck plates, drains, or hardware.
- Mark orientation and labels: Note the bow/stern direction and label each piece (e.g., “cockpit port,” “rear deck,” “forward casting deck”). This prevents confusion when transferring to the EVA foam.
- Allow for small gaps: Most installers leave a small gap (about 1/8″ or 3 mm) around edges and hardware to allow for expansion and drainage.
- Test the template: Remove the template, then place it back down to verify that it fits correctly and lines up with all openings and obstacles.
Step 3: Transfer Templates and Cut the EVA Foam Sheets
Once your templates are dialed in, it is time to lay out and cut your EVA foam boat deck flooring. Take your time here—clean, accurate cuts will define the look of your finished deck.
- Lay out the EVA sheets: Place your EVA foam sheets face down on a clean, flat surface. Make sure the adhesive backing is protected.
- Position templates on the foam: Place each template on the backside of the foam, aligning the grain or pattern direction as desired for a consistent look across the boat.
- Trace carefully: Use a fine-tip marker or pencil to transfer the outline from the template to the foam backing.
- Use sharp blades: Cut along your traced lines with a sharp utility knife or hobby knife. Change blades frequently to avoid tearing or rough edges.
- Support the cuts: Use a straightedge for long, straight cuts, and take your time around curves and tight corners.
- Dry-fit pieces as you go: After cutting each piece, place it on the deck to confirm fit before moving to the next section.
Installation Guide: Custom Pre-Cut EVA Foam Boat Flooring
Step 4: Dry Fit All DIY-Cut EVA Foam Pieces
Before peeling any adhesive backing, do a complete dry fit of your EVA foam boat flooring. This is your chance to make fine adjustments without committing.
- Lay out all pieces: Position every cut foam piece in its final location on the deck, following your labels and orientation marks.
- Check seams and gaps: Make sure seams align cleanly, gaps around hatches and hardware are consistent, and there is no overlap or binding.
- Adjust as needed: Trim edges slightly where needed to improve fit. Work slowly; it is easier to remove a little material than to fix an over-cut piece.
- Confirm access: Open hatches, inspect hinges, and verify that all important components can move freely with the foam in place.
Step 5: Bond the DIY EVA Foam Flooring to the Deck
When you are satisfied with the dry fit, you are ready to bond the EVA foam to the deck. Work methodically and avoid touching the adhesive with dirty hands.
- Work in sections: Start with a central or easily accessible area before moving to more complex sections.
- Final surface wipe: Just before installation, wipe the deck again with alcohol or approved cleaner to remove any dust.
- Peel back part of the liner: For self-adhesive EVA foam, peel back a small section of the backing paper (6–12 inches) to expose the adhesive.
- Align carefully: Position the exposed adhesive edge with your reference lines or edges, ensuring the piece is straight and correctly oriented.
- Press as you go: Once the leading edge is where you want it, slowly remove more backing while pressing the foam down with your hand or a soft squeegee to avoid trapping air.
- For non-adhesive foam: If your EVA foam requires separate adhesive, follow the manufacturer’s spread rate and open time instructions exactly.
Step 6: Roll, Press, and Check for Bubbles
Once a piece is in place, firm, even pressure ensures maximum contact between the EVA foam flooring and your boat deck.
- Use a roller: Go over the entire piece with a hard rubber roller or J-roller, working from the center toward the edges to push out any air.
- Pay attention to edges and corners: Press extra firmly along borders, seams, and around cutouts where lifting is most likely to happen.
- Check for bubbles: If small bubbles appear, you can often work them out toward the edge with a squeegee. Persistent bubbles may require carefully lifting and reapplying that area if the adhesive allows.
- Repeat for all pieces: Apply, press, and roll each piece before moving to the next section of the deck.
Step 7: Final Inspection and Curing Time
After all EVA foam boat flooring pieces are installed, take time for a thorough inspection and let the adhesive cure properly.
- Walk the deck: Gently walk every area, feeling for soft spots, bubbles, or edges that are not fully bonded.
- Inspect seams: Confirm that seams are tight and consistent and that there are no gaps that could catch debris.
- Re-roll problem areas: If you find any sections that are not fully adhered, re-roll them with firm pressure.
- Respect cure times: Follow your manufacturer’s recommendations for cure time before heavy use, washing, or exposing the boat to extreme heat and moisture. In many cases, 24–48 hours of light use only is ideal.
Extra DIY Tips and Common Mistakes to Avoid
Even experienced DIYers can run into challenges when installing EVA foam boat decking. Keep these tips in mind to get the best possible result:
- Do not rush surface prep: Skipping cleaning or sanding steps is the fastest way to cause peeling or lifting later.
- Avoid installing in extreme temperatures: Very hot or cold conditions can affect adhesive performance. Aim for moderate temperatures and dry weather.
- Plan your layout: Decide where seams will fall before you cut. Symmetry and consistent grain direction make a big visual difference.
- Use fresh blades: Dull knives tear foam and leave ragged edges. Change blades often.
- Watch your knees and shoes: Sharp objects, dirty shoes, or kneeling on small hardware during installation can dent or damage the foam.
- Test cleaners: Before using any chemical around your new EVA foam boat flooring, test it in a small, hidden area or confirm with the manufacturer that it is safe.
Basic Care and Maintenance for Any EVA Foam Boat Flooring
One of the biggest benefits of EVA foam marine flooring is how easy it is to maintain. Regular light cleaning will keep your deck looking sharp season after season.
- Rinse regularly: Rinse the deck with fresh water after each trip to remove salt, fish slime, and dirt.
- Use mild soap: For deeper cleaning, use a soft brush or cloth with mild boat soap. Avoid harsh solvents or abrasive pads that can damage the foam.
- Address spills promptly: Clean up fuel, oil, or food spills as soon as possible to prevent staining.
- Avoid sharp objects: While durable, EVA foam can be cut by knives or sharp tools. Use cutting boards and be mindful when handling hooks and gaffs.
- Protect from extreme heat: Prolonged exposure to very high temperatures can affect adhesion. When possible, cover your boat or store it under shade.
Ready to Upgrade Your Boat with EVA Foam Flooring?
Installing EVA foam boat flooring is one of the most rewarding DIY upgrades you can make to your boat. With the right materials, careful templating, and patient installation, you can transform your deck with a comfortable, non-slip surface that looks like it came straight from the factory.
If you would like professional guidance, custom-cut EVA foam boat deck kits, or help choosing the right pattern and color for your vessel, our team is here to help.
Contact our marine flooring specialists today to get started on your EVA foam boat flooring project now.
Leave a Reply